In this blog we discuss how to move/migrate a list and designer workflow from SharePoint 2010 to SharePoint 2013.
You can do it by following the steps below:
- Back up the SharePoint 2010 Content Database and create a web application in SharePoint Server 2013.
- Then remove the Content Database from the new web application and restore the Content Database backup in SharePoint 2013.
- After that associate the Content Database with the new web application.
- Now, Export the list from SharePoint 2010 and then Import the list in SharePoint 2013.
- Finally, view the list in SharePoint 2013.
SharePoint list migration steps in detail
Now perform the list migration using the Central Administration and rest we are going with the SharePoint Management Shell cmdlets.
Back up the SharePoint 2010 Content Database.
Firstly, take a backup of the SharePoint 2010 Content Database that is the Site Collection with the required list in the SQL Server in SharePoint 2010 farm.
- Right-click on the database, and click Tasks>Back Up.
- Enter an SQL Server destination to back up the database; click OK.
- Create a web application in SharePoint Server 2013.
You need to create a new web application in SharePoint Server 2013 from Central Administration by following the steps:
- You need to open the SharePoint 2013 Central Administration, and click Application Management on the home page and then on the Application Management page, click Manage web applications (under Web Applications).
- Then, in the ribbon, go to the Contribute group and click New and on the Create New Web Application page, provide the required details under various sections and click OK.
- Remove the Content Database from the new web application.
This can be done using Central Administration.
- Go to Central Administration > Application Management, and click Manage content databases (under Databases) and check the Remove content database checkbox, and click Save; click OK.
- Restore the Content Database backup in SharePoint 2013.
Now you need to restore the Content Database backup of the 2010 farm to the new SharePoint 2013 farm.
- Go to Central Administration, and click Restore from a backup in Backup and Restore section after that perform three steps—Select the backup job with the content database backup, select the check box near the content database, click the Same configuration option (under Types of Restore), and click OK.
- Click Start Restore.
Note: You can check the status on the Backup and Restore Job status page, under the Readiness section.
- Associate the Content Database with the new web application.
Now it’s time to make the read-only content database to a read-write one. Here you associate the Content Database with the newly created web application. This is done by attaching and restoring the read-only database using the SharePoint 2013 Management Shell.
- Open SharePoint 2013 Management Shell, and run:
| Mount-SPContentDatabase –Name <DatabaseName> -WebApplication <WebApplicationID> [-Verbose] |
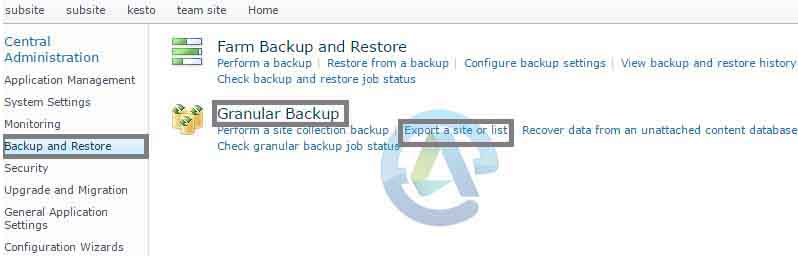
- Export the list from SharePoint 2010.
Now you can simply export the list using the Central Administration Backup and Restore facility.
- Open SharePoint 2010 Central Administration and click Backup and Restore and then, click Export a site or list under Granular Backup
- After that, select the site collection that contains the list to be exported; you have to select the site and the list too. Provide the destination as well. Finally click Start Export.
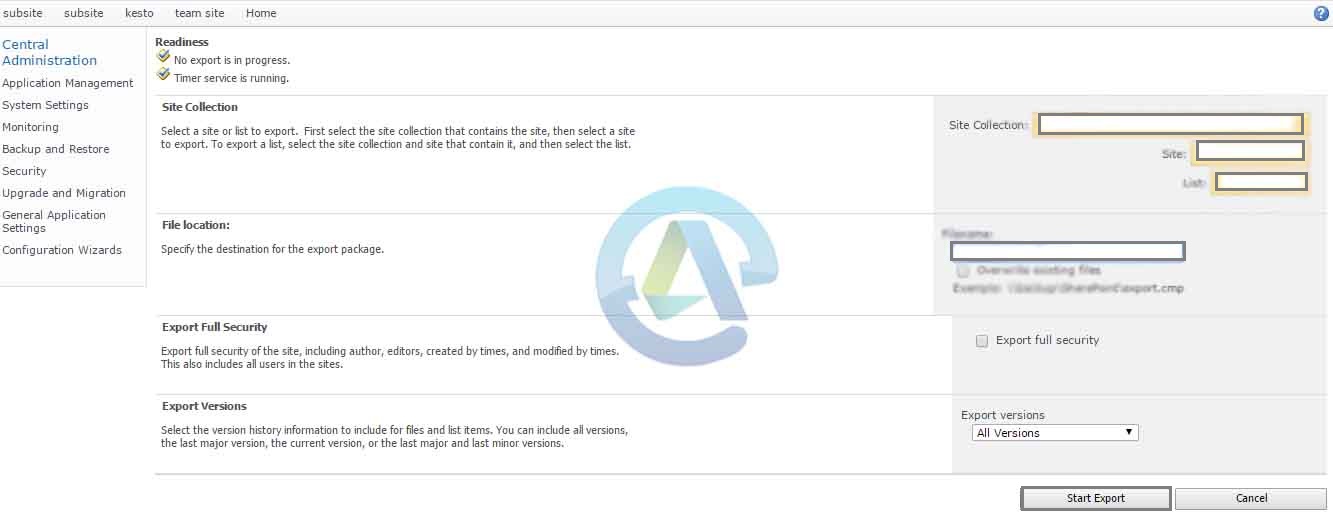
Note: you can view the status in Granular Backup Job Status page.
- Import the list in SharePoint 2013.
An Administrator group member with security admin fixed server role (on SQL Server instance) and db_owner fixed database role (on the database) can use the SharePoint 2013 Management Shell to import the list.
- Open the SharePoint 2013 Management Shell and run:
| Import-SPWeb -Identity <SiteURL> -Path <ImportFileName> [-Force] [-NoFileCompression] [-Verbose] |
- View the list in SharePoint 2013.
Finally, open the SharePoint 2013 site to see the list there!
By following above steps you can easily migrate/move a list from SharePoint 2010 farm to SharePoint 2013.